


How To Get Out Of Pain In 30 Days (On Your Own):
(Includes “Paper Hair Trick,” Massage Techniques & Action Plan)
There is a process for developing the ‘feel’ of an expert Physical Therapist, and anyone can do it. When you learn how to use your hands as another set of eyes, you can immediately understand why you’re in pain, tight, or weak; then, act accordingly by releasing tissue back into place to create a healing/growth state in your body.
In order to develop skilled touch, it’s important you follow/learn these 3 steps:
- Develop Palpation Skills: Paper Hair Trick
- Find Tissue Abnormalities: Learn About Tissue ‘Feel’
- Get Rid of the Problem: The 3 Most Important Massage Techniques To Release Tight Tissue

Step 1: Develop Palpation Skills
Palpation skills are the difference between ‘knowing’ what’s wrong and having an idea. Most of the time, you can learn more through your fingers than through an X-ray, MRI, or CT-scan; the reason being, you can correlate what you feel when you touch/press on something to a feeling of pain, discomfort, or that nothing is wrong.
If we took MRI’s of the entire US adult population, about 50% of us would show at least one herniated disc, but this doesn’t mean that we are all symptomatic. If a disc presses on a nerve root, you’ll know about it. Likewise, if you press on an area that is sensitive, you’ll also know about it. When you’re able to differentiate between the feel of one type of issue vs another, you’ll be able to quickly resolve whatever challenge you face, albeit pain or inflexibility.
Pull one hair out of your head, place it on a table in front of you, and lay a single piece of paper on top. Now, close your eyes and comb over the paper until you find the hair; continue to drag the hair underneath your finger and around the paper until you lose it. Repeat for 15 minutes/day. Within 2-4 weeks, you’ll have an incredible sense of touch.
WARNING: I decided to get a bit crazy on this one and take things to the next level by placing 2 sheets of paper on top of the hair. The end result, over a period of 3-4 months, was hypersensitivity. The free nerve endings in my hands over-developed, and I began to feel pain instead of ‘hot’ or ‘cold.’ It’s nice to have X-ray hands as a Doctor of Physical Therapy, but you may not want to go this far.
Step 2: Feel For Tissue Abnormalities
Once you learn ‘how’ to feel, it’s time to apply that skill by learning about various types of ’tissue feel’ in your body. Each type of tissue feel occurs for different reasons and will point towards the root cause of discomfort, along with a plan of action to resolve it. When you’re able to tell the difference between abnormal muscle tissue feels, you’ll be better equipped to know how to handle them; similarly, when you can sense ‘constant tension’ in a muscle, it may be indicative that you should be working higher up, on a nerve or section of your spine. This can be a game-changing difference in your outcome and level of success.
Here’s a video and table that will help you understand and test tissue feel on your own body:
Tissue Feel Test:
Instructions for testing feel: Press firmly down with one finger and note response of body/skin; now repeat with entire palm of hand and observe again. Finally, perform the wringing technique to the surrounding area to judge your general level of restriction.
| Type of Tissue Feel: | Description: | When You’ll Feel This: |
| Normal | normal skin elasticity, no pain with palpation, normal temperature and sensitivity | touch anywhere that is not in pain; you’ll get an idea how your body/skin are supposed to react. |
| Boggy | bounce-back sensation when you press on it, as if there is fluid gently pushing back against you | acute or chronic swelling as a result of a new or old injury (typically muscle injury) |
| Soft | feels like something is missing (not enough muscle or depth) | can occur from chronic swelling, nerve injury, or other serious trauma leading to muscle wasting |
| Hard | almost bone-like, or a very specific area where something feels firmer than it typically would, as if calcium/bone were trying to deposit | occurs as a result of over-healing and is basically a build-up of calcium over time; often times, this occurs near an old fracture, scar tissue, or other chronic tendonitis that turns to tendinosis |
| Tense | feels almost as if you are ‘flexing’ your muscle, or attempting to contract it; often times, it’s the entire distribution of the muscle, not just one section | over-excitation of nerve root in related spinal segment, near muscle, or in direction of spine; also can occur as a protective mechanism when a surrounding muscle is injured or needs stress taken off |
| Bundled | feels as if multiple muscles are a single muscle, in that all muscles are tense, and it’s hard to distinguish between them when you perform the wringing technique (Tissue Feel Test video explains this) | very typical with fascial restrictions from inflammation or old injury; also occurs when exercising in an imbalanced way, or when your nervous system doesn’t properly distinguish between individual muscles due to poor muscle recruitment strategy |
| Hot | warm to the touch; occurs with injury and is notably warmer than surrounding tissue | following acute injury or strain; could be indicative of circulatory issue if associated with swelling, pain, or any other sign/symptom of vascular disease.CAUTION: especially in lower leg or following surgery, serious injury, or with family history — could be indicative of a blood clot and should be screened to be sure. |
| Cold | cold to the touch, as compared to surrounding body parts or the rest of a muscle | occurs with poor vascularity or restriction of blood flow from a particular area of a muscle or tissueCAUTION: if a body part is chronically cold, or suddenly cold, it could be indicative of a circulatory problem and should be screened by a doctor immediately. |
| Pulsating | light to moderate: faint sensation that is barely noticeable, but feels like a very distant heartbeatmoderate to heavy: throbbing sensation that feels similar to putting your hand over your heart, but on another body part (a bit less intense) |
occurs when blood flow returns to a muscle, tissue, or body part after having been restricted; often noticeable during or following massage techniques, warm up, or any form of myofascial releaseCAUTION: loss of a pulsation from an area where you would typically expect it, or overly strong anywhere in your body could be a sign of a circulatory issue and should be screened by your doctor. |
| Electrical | “zinging” sensation that feels like a super light version of touching an electrical socket (don’t do this!); otherwise described as a moving sensation underneath your finger/hand | occurs when neurological signal returns to a muscle, motor point, or body part after having been restricted; often noticeable during or following myofascial release |
| Hyposensitive/Numb | disconnect between what you see and what you feel — when you place your finger/hand on a body part, you expect to feel the way you do everywhere else, but there’s less sensation than you’d expect. | occurs with nerve restriction (can happen through myofascial restriction) or nerve injury; also can occur through poor circulation and is very typical in people with Diabetes in their hands and feet |
| Hypersensitive | disconnect between what you see and what you feel — when you place your finger/hand on a body part, you expect to feel the way you do everywhere else, but there’s more sensation than you’d expect. | Occurs with nerve irritation or stimulation, as well as return of blood flow to a body part. e.g., when you uncross your legs after having sat in the same position for awhile and you feel pins and needles — typically more localized than an entire leg or arm when noted with tissue feel test. |
| Painful (sharp or dull) | your body doesn’t give you enough time to really observe the feeling; instead, there is an immediate pain response (either sharp or dull) | sharp: acute injurydull: muscle soreness, old injury, chronic tightness, overuse of a particular area of a muscle |
The goal is to figure out any ‘abnormal’ tissue feels you have in your body. These are the areas of your body you’ll focus on with the massage techniques below. Recommended locations for checking are:
| Locations: | Anatomy Diagram: |
| Sub-occipital Muscles | 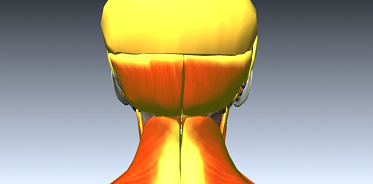 |
| Traps | 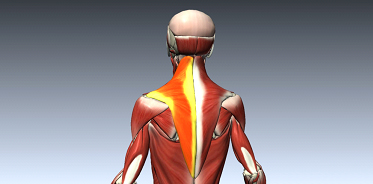 |
| Pecs | 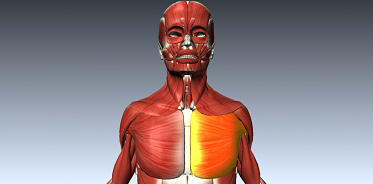 |
| Rotator Cuff | 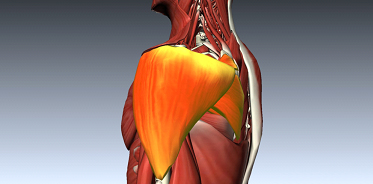 |
| Q.L. | 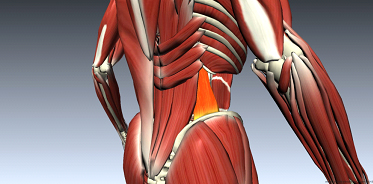 |
| Psoas | 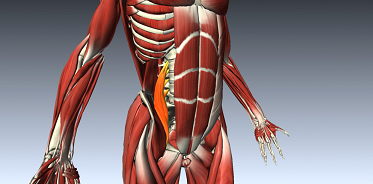 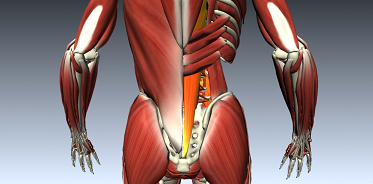 |
| Piriformis | 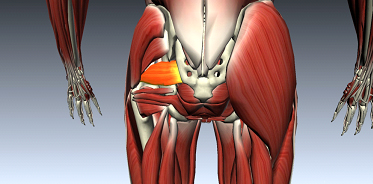 |
| Glute/Ham |  |
| Hip Flexor | 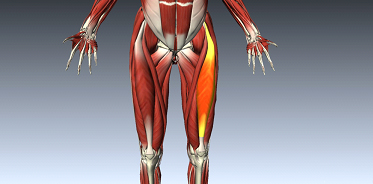 |
| Femoral Triangle | 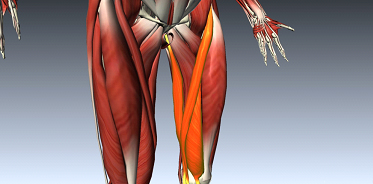 |
| IT Band | 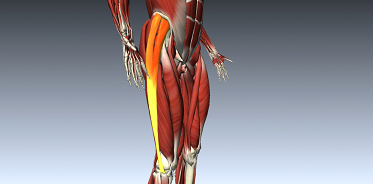 |
| Gastroc/Soleus Complex | 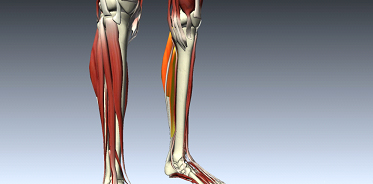 |
*NOTE: Posture can also affect pain in a dramatic way. If you aren’t feeling tissue abnormalities, or you’ve already resolved them, here are some postural exercises that have been shown to improve posture dramatically within just 14 days.

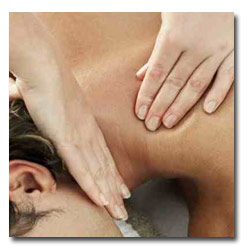
Step 3: Get Rid Of The Problem
Finally, after you have identified where the problem or sore spot is, it’s time work specifically on your source of discomfort and eliminate it. The key is to find the area of greatest soreness and work on this specific area. Often times, a domino effect takes place, where you release the ‘mother knot’ and the rest of the tension disappears.
The three most important massage techniques to learn are:
Each massage technique is used for different types of tissue feels and for different issues. By learning how to choose and implement the proper massage technique, you’ll achieve the fastest possible result. Here’s a summary table that may help:
| Massage Technique: | Purpose: | Abnormal Tissue Feels This Is Good For: |
| J-stroke | release knots, tight tissue, or muscle restriction (superficial or deep, but best used superficially) | Hard, Tense, Bundled, Hot, Cold, Pulsating, Hyposensitive/Numb, Hypersensitive, Painful |
| MLD | get rid of swelling/inflammation, improve range of motion for a restricted joint | Boggy, Soft, Tense, Bundled, Hot, Cold, Pulsating, Electrical, Hyposensitive/Numb, Hypersensitive, Painful |
| Myofascial Release | release tension of multiple muscles, tissues, or muscle groups at the same time by using the philosophy of an “anchor point” pulling on everything else; works extremely well with acute and chronic issues by targeting the specific techniques demonstrated in the video below | Boggy, Hard, Tense, Bundled, Hot, Cold, Pulsating, Electrical, Hyposensitive/Numb, Hypersensitive, Painful |
Learning how to properly release tissue, get rid of inflammation, and restore myofascial length are paramount to your success. These techniques aren’t difficult to pick up, but they do require a bit of practice to become proficient. When used in combination, these 3 massage techniques trump just about any ‘therapeutic’ massage you can imagine.
30 Day Action Plan:
Let’s put it all together and give you a 30 Day Action Plan for Skilled Touch. A super small investment of time now will lead towards better health for you, your loved ones, and anyone else you decide to influence. Health is easy when you know the tricks and have a plan.
No advice or information is ever beneficial unless you know how to implement it easily. The best thing you can do to master skilled touch is block off 15 minutes/day for the next 30 days, as follows:
Skilled Touch in 30 Days:
Today – Begin Paper Hair Trick – 15 minutes/day is all it takes. Do this every day for the next 30 days.
Days 2-25 – Connect your body and mind — take notice of your environment. Every time you pick something up, use all 5 sense and really focus on ‘feel.’ Does it feel cold/hot, metallic or plastic, are there grooves? Do you feel it in the palm of your hand or through your fingers? If through your fingers, which one?
Day 26 – Learn ‘Tissue Feel’ by touching the specified areas above on your body that are both in/out of pain. Write down your findings and repeat on Day 30 to observe changes.
Day 27 – Learn J-stroking. Find a friend (I’m sure they’ll be happy to volunteer) and offer a massage. Learn to feel through your fingers and ‘sense’ if there are restrictions. Work on those restrictions with your J-stroke and take notice of the way they soften and go away. Have this friend come back in 2 days, ideally.
Day 28 – Learn MLD. This is a technique that can only help, not hurt; as such, we’ll have you practice on yourself. Find an area that is tight or swollen on your body and develop a touch for the least amount of pressure it takes to move your skin in both directions to create the elastic rebound effect you learned about in the video. Repeat all over your body or on enough body parts to get the hang of doing this with just a couple fingers, as well as your entire hand. You’ll notice certain contours of your body are easier to navigate with one or the other.
Day 29 – Learn Myofascial Release. It’s really cool if you get to work with the same person as Day 27, as you’ll begin to sense how these techniques can work together. However, you’ll be able to learn either way. Close your eyes, focus on your hands and fingers, cross your hands gently on your friend’s back, and then move ‘with’ his/her body. You’ll begin to feel the ‘give’ and ‘rhythm,’ as fascia unwinds. Remember not to press too hard — learn lightly, as the deeper techniques should typically be done by a Physical Therapist only.
Day 30 – Integration Day. Find an area on your body that is tight or sore and follow these steps:
Step 1 – MLD on closest watershed to this body part for 5 minutes, then move down gradually towards involved area and spend 5 more minutes. Reminder from MLD video (above): Watersheds are areas of greatest lymphatic flow and serve to stimulate the rest of your lymphatic vessels nearby (making it easier to get rid of swelling, faster):
- Carotid Sinus
- Axillary
- Inguinal
Step 2 – J-stroke on all of surrounding areas, following direction of whichever muscle fibers you feel. Basically, if you know your quad runs ‘top-down’ then you would work ‘with’ the muscle in that direction. If you don’t know, there’s still plenty of benefit if you pick any direction. — 3-5 minutes
Step 3 – Myofascial Release — now we’re taking a look at the bigger picture and finding the ‘trigger’ points that will have the greatest effect. Here’s a video cheat sheet (I’ve also included self-release techniques for body parts you can’t reach):
Step 4 – Re-test Tissue Feel from Day 26 and write down your notes. Cross-off all ‘normal’ tissue feels and repeat tissue feel test daily until all tissue abnormalities are resolved.