


First, ‘release’ the tight muscles in your head/neck – Press in lightly on the muscle belly and see if there is sensitivity or referred pain. If pain or discomfort exists, or you feel knots, you’ll need to release this area.
Release Instructions:
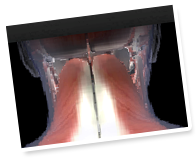
Ligamentum Nuchae – lay your back, head flat on the floor (unless you require pillow support), knees bent and feet flat on the floor. Gently stroke the back of your head, along this ligament, from top to bottom. Very light pressure inward while you stroke it is recommended. Continue for 60-90 seconds, as you feel the muscles in your neck begin to relax.
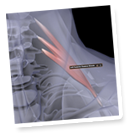
Step #2: Pulley exercise – your levator scapulae attach to your neck and form a pulley when you consider both sides attaching to the same vertebrae. If your right side is sensitive, lift your left elbow up so your arm is 90 degrees out to the side. Now, press downwards on a fixed surface, like a countertop or bar, while holding your head in a neutral or slightly retracted position. Hold 10 seconds and repeat 10x.
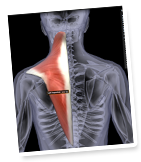
Trapezius – 2 steps:
Step #2:Press diagonally down and towards your opposite hip on the ‘good hurt’ spot in your upper trap. This is actually your cervical rib (first rib), not a muscle knot. The goal is not to press too hard, as it could create a fracture if you really used force. Instead, you are coercing the rib to relax and sit down. Currently, it’s stuck in the fascia (connective tissue) of your muscle belly. By pressing on it gently, and diagonally towards your opposite hip, you are signaling to your body that it’s ok for your rib to let go and relax. Hold for 30-45 seconds or until you find relief. (A golf ball may also be helpful for adding pressure if you’re having difficulty with your fingers.)
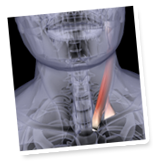
SCM – time to “milk your neck.”
If it’s your left SCM, then turn your head to the right and look for the muscle that juts out from your ear all the way down to your sternum. Lightly pinch and let go of the muscle close to your ear and continue to ‘milk’ the muscle, top to bottom, until there are no longer sensitive areas leftover. (estimate = 3-5 minutes per side)
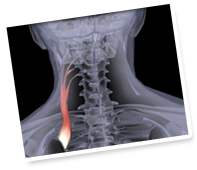
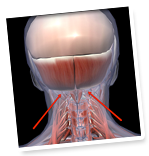
Scalenes – using the pinky side of your hand (medial), and your fingers extended, keep your neck retracted slightly as your place light and gentle pressure at the top of your scalenes. Now, drag your hand downward towards the bottom of your neck, where your scalenes end. Continue to ‘stroke’ your neck, top to bottom, until you no longer have sensitive areas along the way. (estimate = 2-5 minutes)
Sub-occipital Muscles – the best way to perform a sub-occipital release is by using a golf ball and laying on your back with your feet flat and knees bent. Place the golf ball under your head, just underneath the bottom of your skull, at the origin of the ligamentum nuchae. Now, roll the golf ball slowly to the left, and slowly to the right (just underneath the bone, and avoiding crossing your spine) — find out if one side is more sensitive — if so, release this side by continuing to roll gently side to side in this area. (estimate = 5-10 minutes)
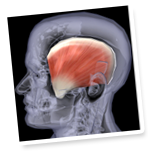
Temporalis – most people want to press on their temples when they have discomfort in this area. Instead, perform J-strokes just above your ears, about halfway up your head. J-strokes are done by placing pressure through your fingers into the muscle (light to moderate) and then dragging the skin/muscle in the shape of the letter ‘J’ for about 2 inches. Repeat at the rate of 1 repetition every 3-4 seconds and continue until area is completely released (pain-free.) (estimate = 2 minutes)
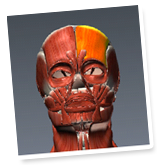
Frontalis – same as above, but this time, just above your forehead, in the front of your skull. J-strokes are amazing here, as well. Likewise, a ‘hair pull’ is very effective — to do a hair pull, pull gently on your hair in the front of your head, out and down towards your eyes. Hold this position until you feel it give a bit more, which is when you’ll be released.
With all of these ‘releases,’ it’s important that we apply the CREEP Principle, which as a reminder, means your body responds to a slow and steady stretch over time. All release work is a ‘stretch’ of some sort. By placing very gentle and gradually increasing pressure as your body accepts it, you will get substantially better results.
Next, ‘reposition’ the vertebrae that have moved as a result of tight muscles. You’ll do this by giving yourself a double chin (neck retraction) and then:
- Turn your head left, as far as you can comfortably go; compare this to turning your head right and note the side that is more limited (left or right).
- Now, slowly and repeatedly turn your head right and left, only going as far in both directions as you can comfortably move to your more limited side.
- Every 5-7 reps, your neck should ‘release’ a little bit and allow your ‘limited side’ to go a bit further. Continue until both sides are even. (estimate = 2-7 minutes)
Now, repeat the same exercise as the above, but with side-bending, so:
- Retract your chin.
- Tilt your head so that your left ear approaches your left shoulder, but do not lift up your shoulder; repeat in the opposite direction and notice which side feels more limited.
- Next, slowly and repeatedly tilt your head right and left, only going as far in both directions as you can comfortably move to your more limited side.
- Every 5-7 reps, your neck should ‘release’ a little bit and allow your ‘limited side’ to go a bit further. Continue until both sides are even. (estimate = 2-7 minutes)
Tempo for both exercises: Each repetition, whether turning or bending your neck, should take a total of 16 seconds to complete in both directions, as follows:
2 seconds left
4 seconds back to neutral
2 seconds right
4 seconds back to neutral
This equals one repetition.
In the previous section, we created symmetry, which is important before retraining your muscles to hold you in position. Once symmetrical, it’s time to begin progressive neck/head stability exercises to strengthen and stretch the muscles at fault, while balancing out your neck to relieve future headaches. Please do the following, in phases:
Phase 1 Neck Exercise
Neck Retractions:
- Lay on your back, with a single pillow supporting your head, neck, and shoulders (top of head is at the top of the pillow)
- Position your chin so it’s neither up or down, but straight in front. Retract your chin, as to give yourself a double chin (note: if in doubt, tilt your chin down, not up)
- Hold 10 seconds, retracting lightly the entire time, but not progressively. This is not about ‘how hard’ you can retract your chin; instead, it’s about how easily you can recruit the proper muscles.
- Repeat 6x.
Phase 2 Neck Exercise
Neck Flexes:
- Same position as Phase 1, laying on your back with proper pillow support.
- This time, retract your chin, then lift your head up, such that you are tilting your head forward with your chin towards your chest. It should take 2 seconds to reach the top position.
- Hold 1 second in top position, without tilting your head left or right.
- Slowly release for 4 seconds to the bottom position.
- The final step is ‘un-retracting’ or releasing your chin before you do the following rep.
- Repeat 6x.
Phase 3 Neck Exercise
Neck Side-Flexes:
- Same position as Phases 1 and 2, again emphasizing proper pillow position.
- After retracting your chin, turn your head in either direction and then lift your ear up off the pillow and towards your chest. This time, you are side-bending, instead of forward-flexing.
- Again, up for 2 seconds, hold for 1 second, down for 4 seconds.
- Alternate and repeat on each side for 6 reps.
Phase 4 Neck Exercise
Neck Side Flexes with Open Jaw:
- Identical to Phase 3, except open your mouth before you lift your ear off of the pillow. This way, you are biasing some of your deep neck flexors and assisting in long-term stabilization of your head/neck.
*NOTE: It’s easy to know if you’re pushing too far.
Rules for neck exercise progression:
- On your first day, begin with Phase 1 — if the pain/discomfort increases, back off and do less reps next time (or consult with your Physical Therapist or Doctor.)
- When you tolerate both Phase 1 and Phase 2 exercises for a few days without soreness, or increased frequency of headaches, it’s time to attempt Phases 1-3 all in one day.
- Eventually, you’ll be able to do 6 pain-free reps of all 4 phases in a single day — when this happens, eliminate Phases 1-3 and just do Phase 4 twice a week for another 6 weeks.
- Provided you can tolerate Phase 4 Neck Exercises 2x/week for 6 weeks, you are finished with this exercise program.
**SECOND NOTE: It’s typical to advance 1 phase every week or two, although results may vary substantially, in terms of phase length.